
Tabla de contenido:
- Autor John Day day@howwhatproduce.com.
- Public 2024-01-30 08:40.
- Última modificación 2025-01-23 14:39.

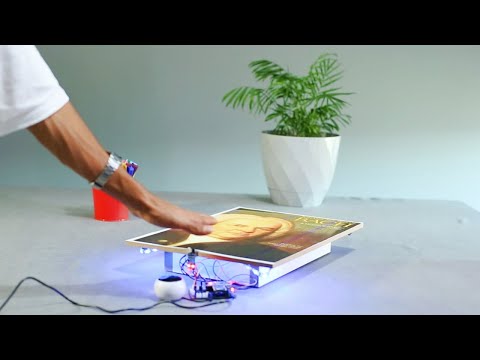
En este video te mostraré cómo hacer un proyecto de arte único en casa usando tira de LED y sonido.
Paso 1: Video del proyecto

Tira de LED:
Reproductor de MP3:
Sensor de infrarrojos:
Microcontrolador -
Conector -
Adaptador -
Regulador de voltaje -
Ponente:
Micro SD:
Condensador -
Resistencia -
Interruptor de palanca:
Herramientas de soldadura:
Paso 2: esquema y Gerber

Obtenga el tablero:
Paso 3: código fuente

Código fuente:
#incluir
#incluir "SoftwareSerial.h" #incluir "DFRobotDFPlayerMini.h" #define NUM_LEDS_PER_STRIP 70 #define BRIGHTNESS 200 #define LED1pin 5 #define LED2pin 6 #define LED3pin 7 const int IR1pin = A0; const int IR2pin = A1; const int IR3pin = A2; CRGB LED1color [NUM_LEDS_PER_STRIP]; CRGB LED2color [NUM_LEDS_PER_STRIP]; CRGB LED3color [NUM_LEDS_PER_STRIP]; SoftwareSerial mySoftwareSerial (10, 11); // RX, TX DFRobotDFPlayerMini myDFPlayer; printDetail vacío (tipo uint8_t, valor int); configuración vacía () {mySoftwareSerial.begin (9600); Serial.begin (115200); if (! myDFPlayer.begin (mySoftwareSerial)) {Serial.println (F ("No se puede comenzar:")); Serial.println (F ("1. ¡Vuelva a comprobar la conexión!")); Serial.println (F ("2. Inserte la tarjeta SD!")); mientras (verdadero); } pinMode (IR1pin, ENTRADA); pinMode (IR2pin, ENTRADA); pinMode (IR3pin, ENTRADA); myDFPlayer.volume (20); myDFPlayer. EQ (DFPLAYER_EQ_CLASSIC); myDFPlayer.outputDevice (DFPLAYER_DEVICE_SD); FastLED.addLeds (LED1color, NUM_LEDS_PER_STRIP); FastLED.addLeds (LED2color, NUM_LEDS_PER_STRIP); FastLED.addLeds (LED3color, NUM_LEDS_PER_STRIP); FastLED.setBrightness (BRILLO); } bucle vacío () {if (digitalRead (IR1pin) == LOW) {LED1show (); } if (digitalRead (IR2pin) == BAJO) {LED2show (); } if (digitalRead (IR3pin) == BAJO) {LED3show (); }} void LED1show () {myDFPlayer.play (1); para (int i = 0; i
Recomendado:
Luces de copa de espuma de bricolaje - Idea de decoración de Diwali fácil y barata con vasos de espuma: 4 pasos

Luces de copa de espuma de bricolaje | Idea de decoración de Diwali fácil y barata con vasos de espuma: en esta publicación, vamos a hablar sobre el proyecto para las celebraciones de Diwali con un presupuesto limitado. Espero que te guste este tutorial
Consejos para hacer realidad la idea de su proyecto: 6 pasos (con imágenes)
")
Consejos para hacer realidad la idea de su proyecto: La parte más crítica de un proyecto exitoso es tener una gran idea, ¡pero a veces la idea es la parte fácil! Después de eso viene el arduo trabajo de convertir un destello aleatorio de genialidad en algo que la gente dice "ooh". y " ah " ov
Robot Gong: la idea definitiva del proyecto Hackaton para expertos en ventas y productos (no se requiere codificación): 17 pasos (con imágenes)
: 17 pasos (con imágenes)")
Robot Gong: la idea definitiva del proyecto Hackaton para expertos en ventas y productos (no se requiere codificación): construyamos un gong musical robótico activado por correo electrónico. Esto le permite configurar alertas automáticas por correo electrónico para activar el gong … (a través de SalesForce, Trello, Basecamp …) Su equipo nunca más se olvidará de " GONGGG " cuando se publica un nuevo código, un dea
Cofre del tesoro de Zelda (con luces y sonido): 12 pasos (con imágenes)
: 12 pasos (con imágenes)")
Cofre del tesoro de Zelda (con luces y sonido): ¡Hola a todos! Era un gran fanático de los juegos de Legend of Zelda cuando era más joven, pero creo que casi todos conocen la melodía icónica que suena cuando abres un cofre en el juego, simplemente suena tan mágico! En este Instructable voy a mostrarles ho
Luces navideñas de bricolaje con música - Luces de la casa coreografiadas: 15 pasos (con imágenes)
")
Luces navideñas de bricolaje con música - Luces de casa con coreografía: Luces de Navidad con música - Luces de casa con coreografía Esto NO es un bricolaje para principiantes. Necesitará un conocimiento firme de la electrónica, los circuitos, la programación BÁSICA y conocimientos generales sobre seguridad eléctrica. Este bricolaje es para una persona con experiencia, así que